Introduction to Workspaces
Run this example in the Anyscale Console or view it on GitHub.
⏱️ Time to complete: 10 min
Welcome! You are currently in a Workspace, which is a persistent cloud IDE connected to a Ray cluster.
In this tutorial, you will learn:
- Basic workspace features such as git repo persistence, cloud storage, and SSH authentication.
- Ray cluster management features, such as adding multiple worker nodes.
- Ray monitoring features such as viewing tasks in the dashboard.
- Dependency management.
"Hello world" in workspaces
Let's start by checking that Ray is working properly in your workspace. You can do this by running the following cell to execute a simple parallel Ray program.
import ray

@ray.remote
def square(x):
    return x ** 2

futures = [square.remote(x) for x in range(100)]
results = ray.get(futures)
print("Success!", results)
Workspace Basics
An Anyscale Workspace is a cloud IDE where you can develop and test Ray programs. Let's get started by creating a new git repo in the workspace's project directory (/home/ray/default). Workspaces will persist the tracked files in this git repo across restarts (as well as other files in the project directory).
We'll use the repo later on to author and run a simple Ray app.
!mkdir my_repo && cd my_repo && git init
Setting up SSH authentication (optional)
Anyscale generates a unique SSH key per user, which is accessible at ~/.ssh/id_rsa.pub. If you'd like, you can add this key to GitHub in order to access private repositories from the workspace.
The public key to add is outputted by the following command:
!cat ~/.ssh/id_rsa.pub
Cloud Storage
Workspace storage in the persisted project directory (/home/ray/default) is limited to 10 GB, so we recommend only using it to store git repos and smaller files. To learn more about options for files and storage, refer to the documentation.
Cloud storage can be read and written from the workspace, as well as from any node in the Ray cluster.
Access built-in cloud storage using the $ANYSCALE_ARTIFACT_STORAGE URI as a prefix:
# Note: "gsutil cp" instead of "aws s3 cp" in GCP clouds.
!echo "hello world" > /tmp/input.txt && aws s3 cp /tmp/input.txt $ANYSCALE_ARTIFACT_STORAGE/saved.txt
# Note: "gsutil cp" instead of "aws s3 cp" in GCP clouds.
!aws s3 cp $ANYSCALE_ARTIFACT_STORAGE/saved.txt /tmp/output.txt && cat /tmp/output.txt
Ray cluster management
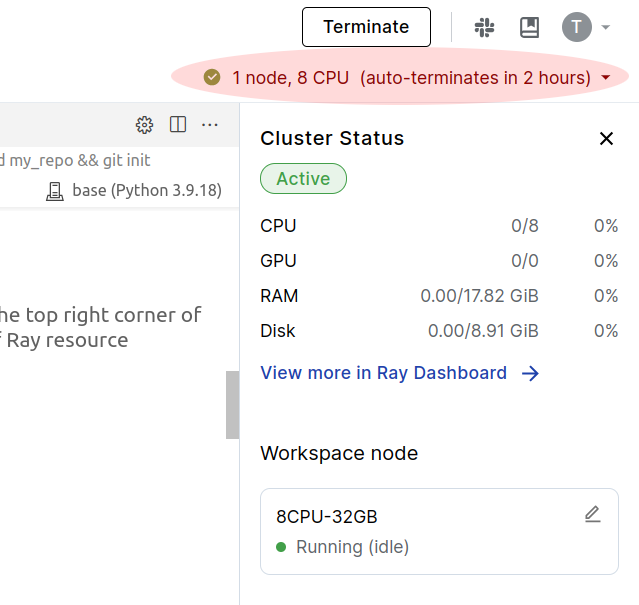
This workspace is connected to a Ray cluster. Click on the resources bar on the top right corner of the screen to open the cluster control panel. This panel shows a summary of Ray resource utilization, and you can use this panel to configure the cluster resources.
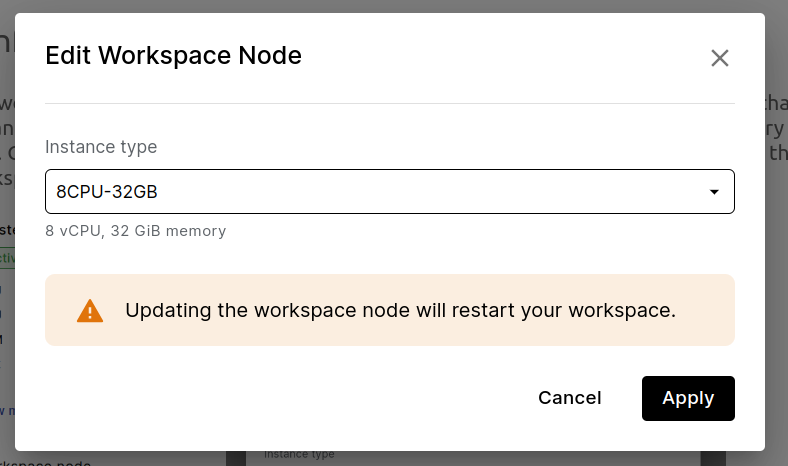
Configuring the Workspace node
The workspace node is the machine this notebook is running inside. You may wish to change the instance type of the workspace node specifically, e.g., to increase the available memory or add a GPU. Click the pencil icon in order to change the workspace node. Note that changing the workspace node will restart the workspace IDE.
Adding worker nodes
To parallelize beyond the resources available to the workspace node, add additional worker nodes to the Ray cluster. Click "Add a node type" to add a number of nodes of a certain type to the cluster. While most use cases only require a single worker node type, you can add multiple distinct node types (e.g., high-CPU and GPU nodes) to the workspace as well.
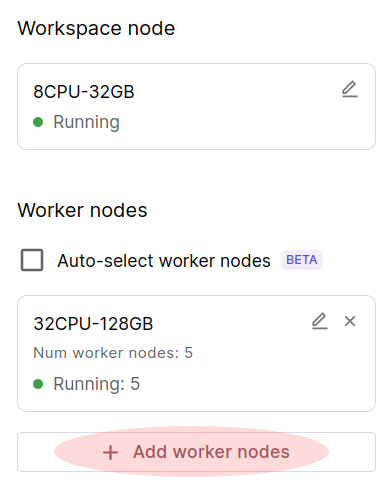

Using "Auto-select workers" mode
To let Ray automatically select what kind of worker nodes to add to the cluster, check the "Auto-select workers" box. Ray will add worker nodes as needed to run submitted tasks and actors. In auto mode, you cannot configure workers, but the resources panel will show which nodes have been launched.
We recommend using auto mode if you do not have specific cluster requirements, and are ok with waiting for the autoscaler to add nodes on-demand to the cluster.
Monitoring Ray applications
In this section, we'll author a simple Ray python script and go over the tools available to monitor its execution. Let's take the opportunity to create a my_app.py file in the my_repo git repo you created earlier.
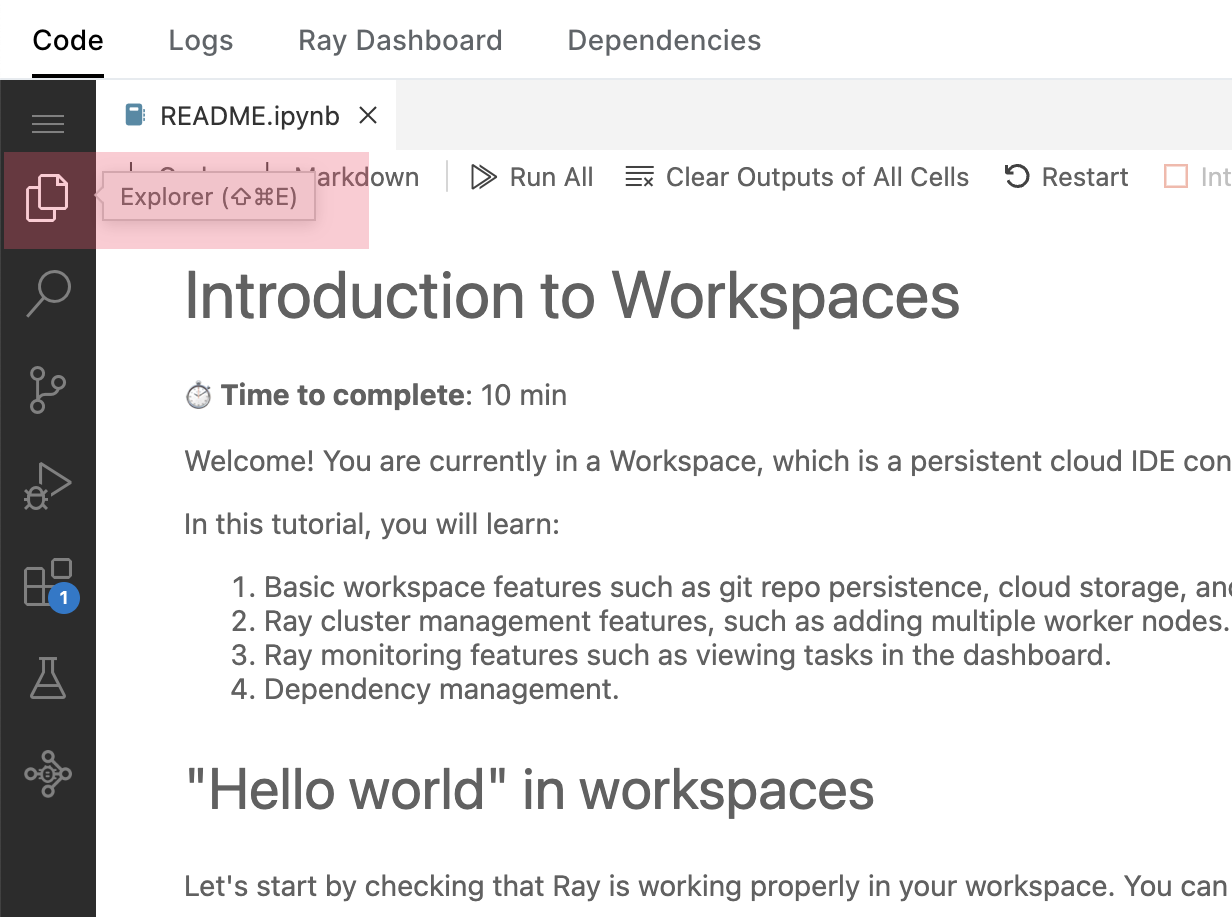
You can click on the "File Explorer" in the left pane of VSCode to create the new file.
Double click this cell to copy & paste the following program into the file :
import ray, time

@ray.remote
def do_some_work():
    print("Doing work")
    time.sleep(5)
    return "Done"

ray.get([do_some_work.remote() for _ in range(100)])
Then, use the next cell or the VSCode terminal to run the file:
!python my_repo/my_app.py
Understanding Ray log output
After running my_app.py, you should see output of the form (do_some_work pid=29848) Doing work [repeated 4x across cluster]. The prefix of the log message shows the function name, PID of the worker that ran the function, and if run on a remote worker, the node IP.
The result of the log message contains stdout and stderr from the function execution. Ray will also deduplicate repetitive logs from parallel execution of functions across the cluster.
Monitoring program execution
Depending on the cluster size, the above script may take some time to run. Try playing around with the number of worker machines, increasing the sleep time, or the number of function calls. Use the tools overviewed below to understand how Ray parallelizes the program.
Let's overview some of the tools available to monitor Ray program execution in workspaces.
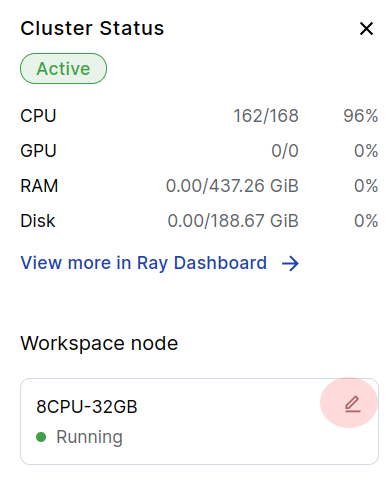
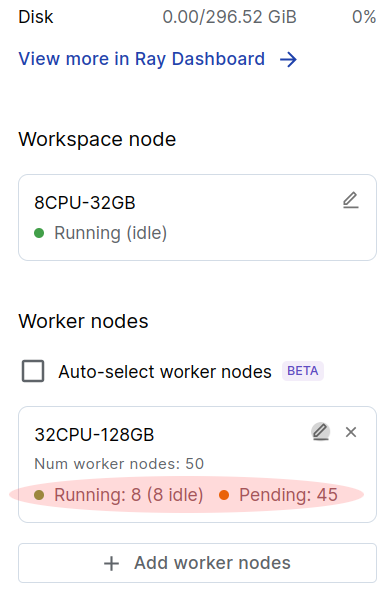
Resources Panel
The resources panel provides basic stats about cluster utilization, as well as an indication of which worker nodes are being used. Use the resource panel as a quick overview of cluster status before diving deeper into the Ray dashboard.
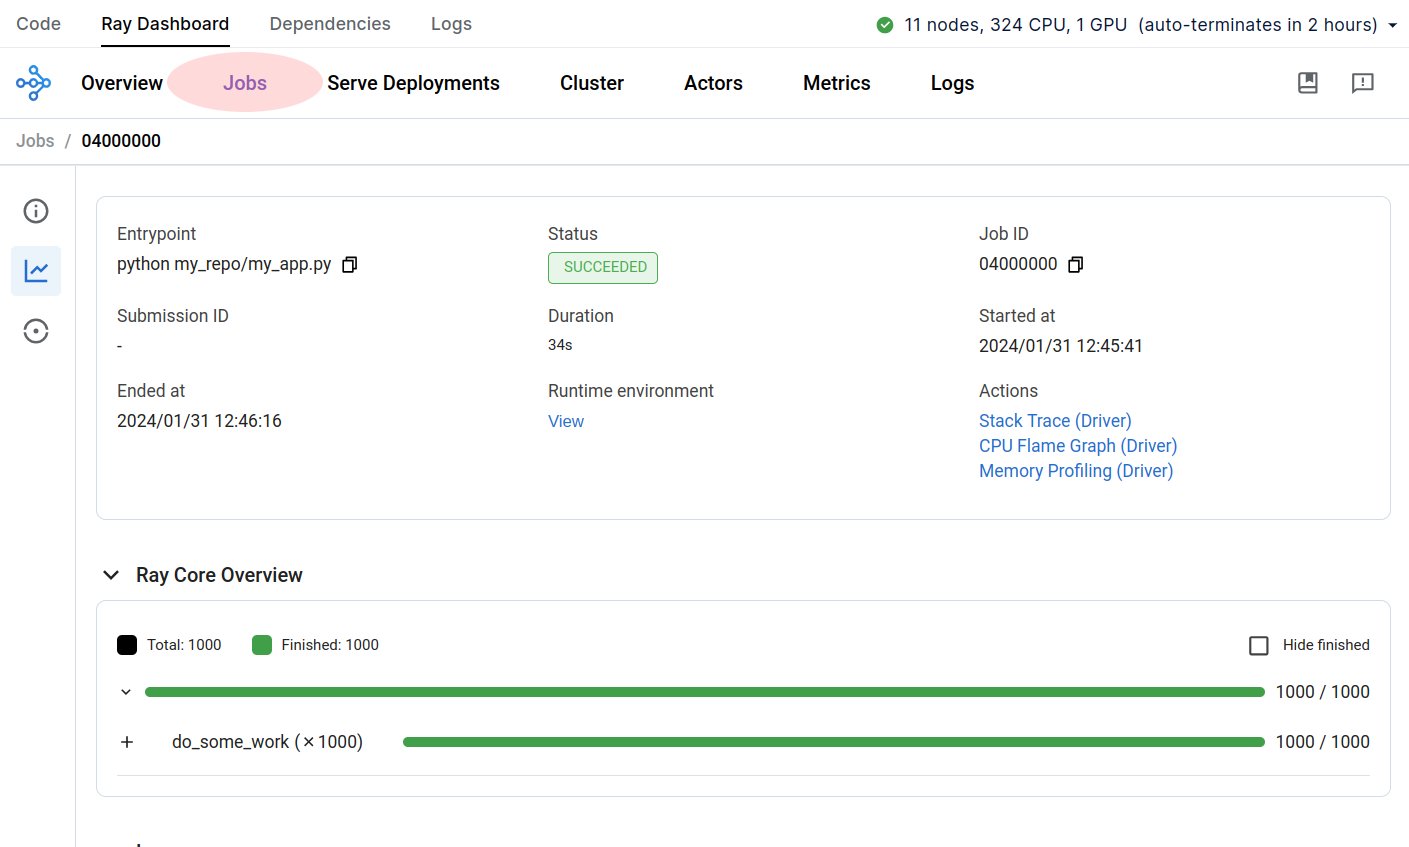
Ray dashboard > Jobs
To see the status of an active or previously run Ray job, navigate to Ray Dashboard > Jobs in the UI. Click a job to open the detail page where you can see an overview of job progress, logs, etc.
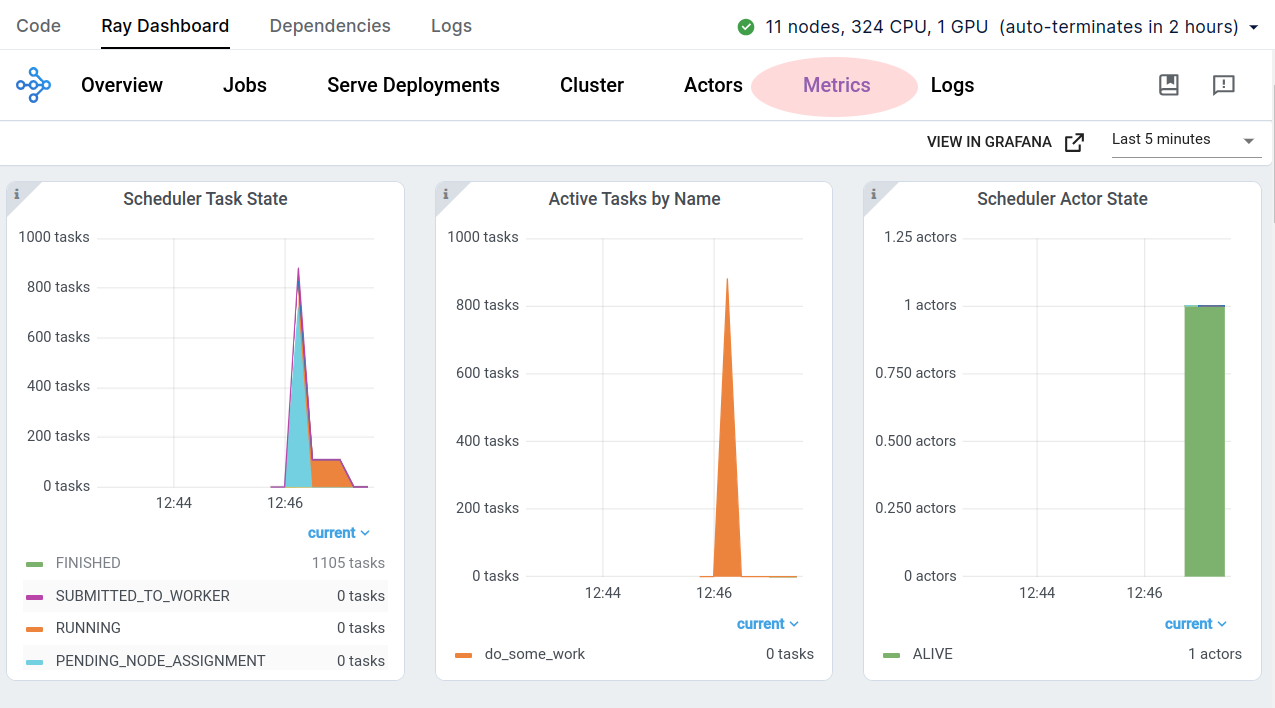
Ray dashboard > Metrics
View the aggregate time-series metrics for the cluster in order to diagnose job execution efficiency. The Ray Dashboard > Metrics page offers metrics on Ray tasks, actors, as well as hardware resource utilization of the cluster.
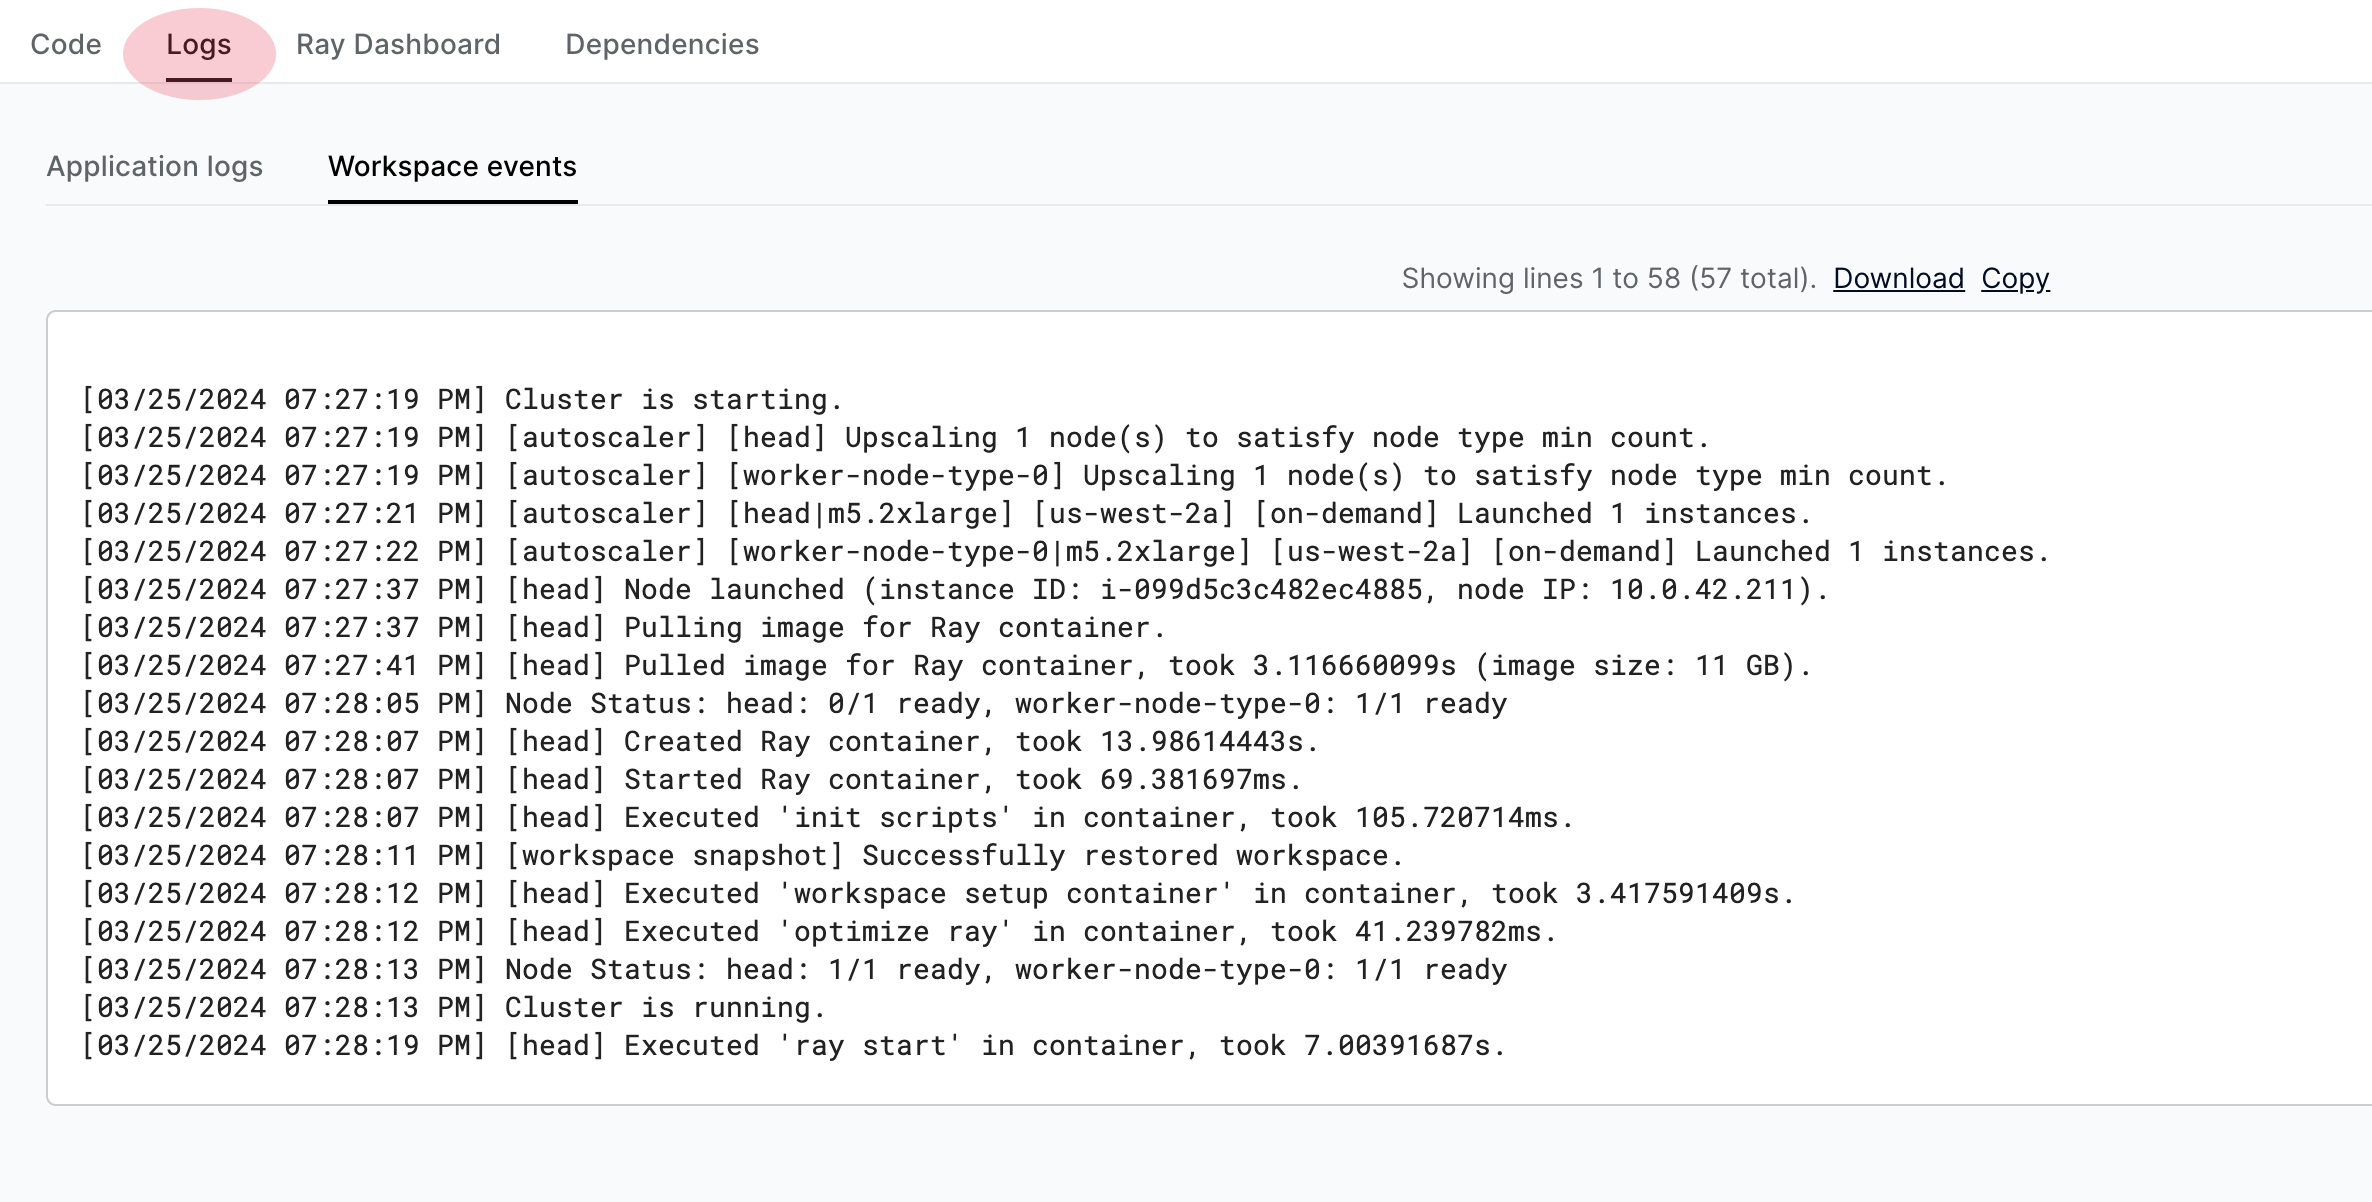
Logs Tab
View and search over Ray cluster and application logs in the Logs tab.
Dependency Management
In order to run code across a cluster, Ray ships code and other library dependencies to other machines in runtime envs. In workspaces, the code and installed PyPI packages are automatically added to the runtime env to be used by Ray.
To try this out, run the following command to install the emoji package. You'll see a notification that the package has been registered with the cluster.
!pip install emoji
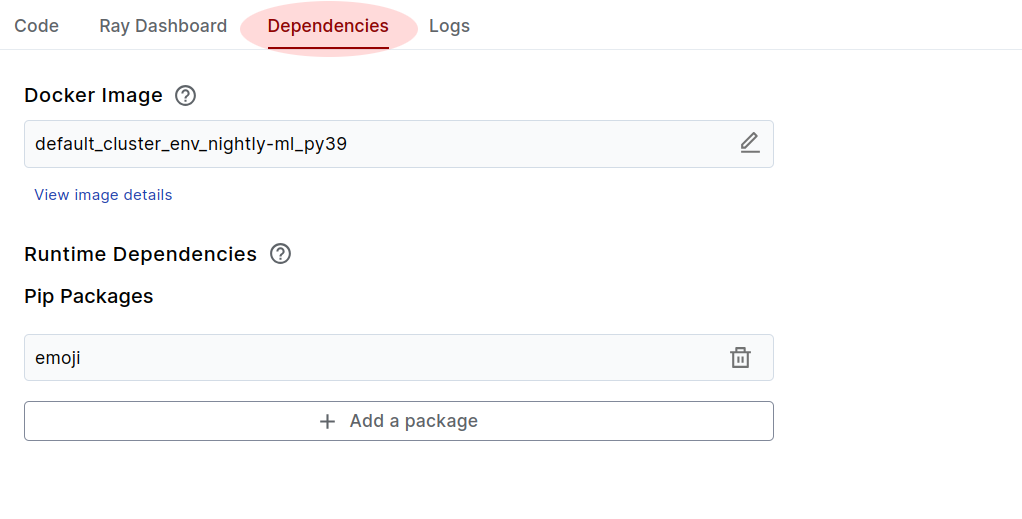
Navigate to the Dependencies tab of the workspace, and you should see the emoji package in the list there. You can use this UI to edit the workspace runtime dependencies, or the UI.
Run the following cell to check that the emoji package is successfully installed on the cluster (to check this properly, make sure the cluster has at least one worker node added).
import ray
import emoji
import time
import os

# Reset the Ray session in the notebook kernel to pick up new dependencies.
if ray.is_initialized():
    ray.shutdown()

@ray.remote
def f():
    my_emoji = os.environ.get("MY_EMOJI", ":thumbs_up:")
    print(emoji.emojize(f"Dependencies are {my_emoji}"))
    time.sleep(5)

ray.get([f.remote() for _ in range(100)])
print("Done")
Cluster env vars
The dependencies tab also lets you set environment variables on cluster workers. Try it out by setting the MY_EMOJI env var and running the cell above again.
Note that this does not set the env var in VSCode, only on the cluster workers.
# First set MY_EMOJI=:palm_tree: in the Workspace > Dependencies tab.
# The code below should then pick up your newly set env var.

# Note: need to reinitialize Ray to clear worker state for this notebook.
if ray.is_initialized():
   ray.shutdown()

ray.get([f.remote() for _ in range(100)])
That's it! Now you know everything you need to build scalable Ray applications in Anyscale Workspaces. Check out the template gallery and Ray documentation to learn more about what you can do with Ray and Anyscale.
Summary
This notebook:
- Set up a basic development project in a workspace.
- Showed how to use different types of persistent storage.
- Demoed how to build and debug basic Ray application.